软硬件环境
- Intel(R) Xeon(R) CPU E5-1607 v4 @ 3.10GHz
- GTX 1070 Ti 32G
- ubuntu 18.04 64bit
- anaconda with python 3.6
- tensorflow-gpu
- keras
- opencv 3.4.3
视频看这里
此处是youtube的播放链接,需要科学上网。喜欢我的视频,请记得订阅我的频道,打开旁边的小铃铛,点赞并分享,感谢您的支持。
HyperLPR简介
HyperLPR是一个基于深度学习的高性能中文车牌识别开源项目,地址是 https://github.com/zeusees/HyperLPR,由python语言编写,同时还支持Linux、Android、iOS、Windows等各主流平台。它拥有不错的识别率,目前已经支持的车牌类型包括
- [X] 单行蓝牌
- [X] 单行黄牌
- [X] 新能源车牌
- [X] 白色警用车牌
- [X] 使馆/港澳车牌
- [X] 教练车牌
HyperLPR的检测流程
- 使用
opencv的HAAR Cascade检测车牌大致位置 Extend检测到的大致位置的矩形区域- 使用类似于
MSER的方式的多级二值化和RANSAC拟合车牌的上下边界 - 使用
CNN Regression回归车牌左右边界 - 使用基于纹理场的算法进行车牌校正倾斜
- 使用
CNN滑动窗切割字符 - 使用
CNN识别字符
HyperLPR安装
git clone https://github.com/zeusees/HyperLPR.git
cd HyperLPR项目同时支持python2和python3,但是在目录结构上有所区分,hyperlpr和heperlpr_py3,我的环境是python3和anaconda,直接将hyperlpr_py3文件夹拷贝到~/anaconda3/lib/python3.6/site-packages/就可以了
测试效果
图片
from hyperlpr_py3 import pipline as pp
import cv2
import click

@click.command()
@click.option('--image', help = 'input image')
def main(image):
    img = cv2.imread(image)
    img,res = pp.SimpleRecognizePlateByE2E(img)
    print(res)

if __name__ == '__main__':
    main()
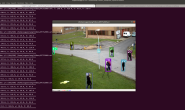
使用项目自带的测试图片进行测试,由于拍摄角度原因,某些识别结果是错误的。
longjing@FR:~/Work/gogs/LPR$ python test_image.py --image demo_images/demo1.png
Using TensorFlow backend.
2018-12-18 15:28:27.628782: I tensorflow/core/platform/cpu_feature_guard.cc:141] Your CPU supports instructions that this TensorFlow binary was not compiled to use: AVX2 FMA
2018-12-18 15:28:27.765931: I tensorflow/core/common_runtime/gpu/gpu_device.cc:1432] Found device 0 with properties:
name: GeForce GTX 1070 Ti major: 6 minor: 1 memoryClockRate(GHz): 1.683
pciBusID: 0000:03:00.0
totalMemory: 7.93GiB freeMemory: 7.15GiB
2018-12-18 15:28:27.765967: I tensorflow/core/common_runtime/gpu/gpu_device.cc:1511] Adding visible gpu devices: 0
2018-12-18 15:28:28.030061: I tensorflow/core/common_runtime/gpu/gpu_device.cc:982] Device interconnect StreamExecutor with strength 1 edge matrix:
2018-12-18 15:28:28.030097: I tensorflow/core/common_runtime/gpu/gpu_device.cc:988]      0
2018-12-18 15:28:28.030105: I tensorflow/core/common_runtime/gpu/gpu_device.cc:1001] 0:   N
2018-12-18 15:28:28.030306: I tensorflow/core/common_runtime/gpu/gpu_device.cc:1115] Created TensorFlow device (/job:localhost/replica:0/task:0/device:GPU:0 with 6899 MB memory) -> physical GPU (device: 0, name: GeForce GTX 1070 Ti, pci bus id: 0000:03:00.0, compute capability: 6.1)
res 闽R6G81
川01C 0.6178697198629379
res 1035
吉晋K03 0.5994847059249878
res K032301
K030X 0.824301564693451
res JK0330
贵晋JK0330 0.9602108970284462
res 闽CR8W
CRM1 0.6328456625342369
res 1NX888
云A赣X881 0.5053929431097848
res 桂ANX889
桂ANX889 0.984427673476083
res 贵JD1687
贵JD1687 0.9756925020899091
res 贵JC3732
贵JC3732 0.8844872457640511
res 1T687
L87 0.6002845267454783
[[[], '川01C', 0.6178697198629379], [[], '吉晋K03', 0.5994847059249878], [[], 'K030X', 0.824301564693451], [[], '贵晋JK0330', 0.9602108970284462], [[], 'CRM1', 0.6328456625342369], [[], '云A赣X881', 0.5053929431097848], [[], '桂ANX889', 0.984427673476083], [[], '贵JD1687', 0.9756925020899091], [[], '贵JC3732', 0.8844872457640511], [[], 'L87', 0.6002845267454783]
视频文件
本质上和图片类似,我们还是利用opencv的接口
# -*- coding: utf-8 -*-
# @time    : 18-12-18 下午3:05
# @author  : xugaoxiang
# @email   : xugx.ai@gmail.com
# @website : https://xugaoxiang.com
# @file    : test_video_file.py
# @software: PyCharm
# python test_video_file.py --video test.mp4

import time
import cv2
from hyperlpr_py3 import pipline as pp
import click

@click.command()
@click.option('--video', help = 'input video file')
def main(video):
    print("[INFO] starting video stream...")
    # vs = VideoStream(src=0).start()
    stream = cv2.VideoCapture(video)
    time.sleep(2.0)

    while True:
        # grab the frame from the threaded video stream
        grabbed, frame = stream.read()
        if not grabbed:
            print('No data, break.')
            break

        _, res = pp.SimpleRecognizePlate(frame)

        # convert the input frame from BGR to RGB then resize it to have
        # a width of 750px (to speedup processing)
        # rgb = cv2.cvtColor(frame, cv2.COLOR_BGR2RGB)
        # rgb = imutils.resize(frame, width = 750)
        # r = frame.shape[1] / float(rgb.shape[1])

        cv2.putText(frame, str(res), (50, 50), cv2.FONT_HERSHEY_SIMPLEX, 0.75, (0, 255, 255), 2)

        cv2.imshow("Frame", frame)
        key = cv2.waitKey(1) & 0xFF

        # if the `q` key was pressed, break from the loop
        if key == ord("q"):
            break

    # do a bit of cleanup
    cv2.destroyAllWindows()
    stream.release()

if __name__ == '__main__':
    main()
程序运行打印如下,识别率还是可以的,但是由于识别检测本身比较耗时,所以从画面上看,就像慢速播放一样,这里需要上层应用根据自己的需要进行丢帧处理
longjing@FR:~/Work/gogs/LPR$ python test_video_file.py --video ~/backup/lpr/2s_lpr.mp4
Using TensorFlow backend.
2018-12-18 16:00:17.067081: I tensorflow/core/platform/cpu_feature_guard.cc:141] Your CPU supports instructions that this TensorFlow binary was not compiled to use: AVX2 FMA
2018-12-18 16:00:17.203116: I tensorflow/core/common_runtime/gpu/gpu_device.cc:1432] Found device 0 with properties:
name: GeForce GTX 1070 Ti major: 6 minor: 1 memoryClockRate(GHz): 1.683
pciBusID: 0000:03:00.0
totalMemory: 7.93GiB freeMemory: 7.12GiB
2018-12-18 16:00:17.203152: I tensorflow/core/common_runtime/gpu/gpu_device.cc:1511] Adding visible gpu devices: 0
2018-12-18 16:00:17.471942: I tensorflow/core/common_runtime/gpu/gpu_device.cc:982] Device interconnect StreamExecutor with strength 1 edge matrix:
2018-12-18 16:00:17.471983: I tensorflow/core/common_runtime/gpu/gpu_device.cc:988]      0
2018-12-18 16:00:17.471991: I tensorflow/core/common_runtime/gpu/gpu_device.cc:1001] 0:   N
2018-12-18 16:00:17.472190: I tensorflow/core/common_runtime/gpu/gpu_device.cc:1115] Created TensorFlow device (/job:localhost/replica:0/task:0/device:GPU:0 with 6875 MB memory) -> physical GPU (device: 0, name: GeForce GTX 1070 Ti, pci bus id: 0000:03:00.0, compute capability: 6.1)
[INFO] starting video stream...
车牌: 沪B28600 相似度: 0.9864972574370248
车牌: 沪B28600 相似度: 0.9910101975713458
车牌: 沪B28600 相似度: 0.9908801657812936
车牌: 沪B28600 相似度: 0.9916305116244725
...
...
...
IPC
跟视频文件差不多,直接上代码了
# -*- coding: utf-8 -*-
# @time : 18-12-18 下午3:05
# @author : xugaoxiang
# @email : xugx.ai@gmail.com
# @website : https://xugaoxiang.com
# @file : test_ipc.py
# @software: PyCharm
# python test_ipc.py --video rtsp://admin:lj12345678@192.168.2.130:554/ISAPI/streaming/channels/101
from imutils.video import VideoStream
import time
import cv2
from hyperlpr_py3 import pipline as pp
import click
@click.command()
@click.option('--video', help = 'input video, ipcamera url or usb camera index.')
def main(video):
print("[INFO] starting video stream...")
# vs = VideoStream(src=0).start()
vs = VideoStream(video).start()
time.sleep(2.0)
while True :
# grab the frame from the threaded video stream
frame = vs.read()
img, res = pp.SimpleRecognizePlate(frame)
print(res)
# convert the input frame from BGR to RGB then resize it to have
# a width of 750px (to speedup processing)
# rgb = cv2.cvtColor(frame, cv2.COLOR_BGR2RGB)
# rgb = imutils.resize(frame, width = 750)
# r = frame.shape[1] / float(rgb.shape[1])
cv2.putText(frame, str(res), (50, 50), cv2.FONT_HERSHEY_SIMPLEX, 0.75, (0, 255, 255), 2)
cv2.imshow("Frame", frame)
key = cv2.waitKey(1) & 0xFF
# if the q key was pressed, break from the loop
if key == ord("q") :
break
# do a bit of cleanup
cv2.destroyAllWindows()
vs.stop()
if __name__ == '__main__':
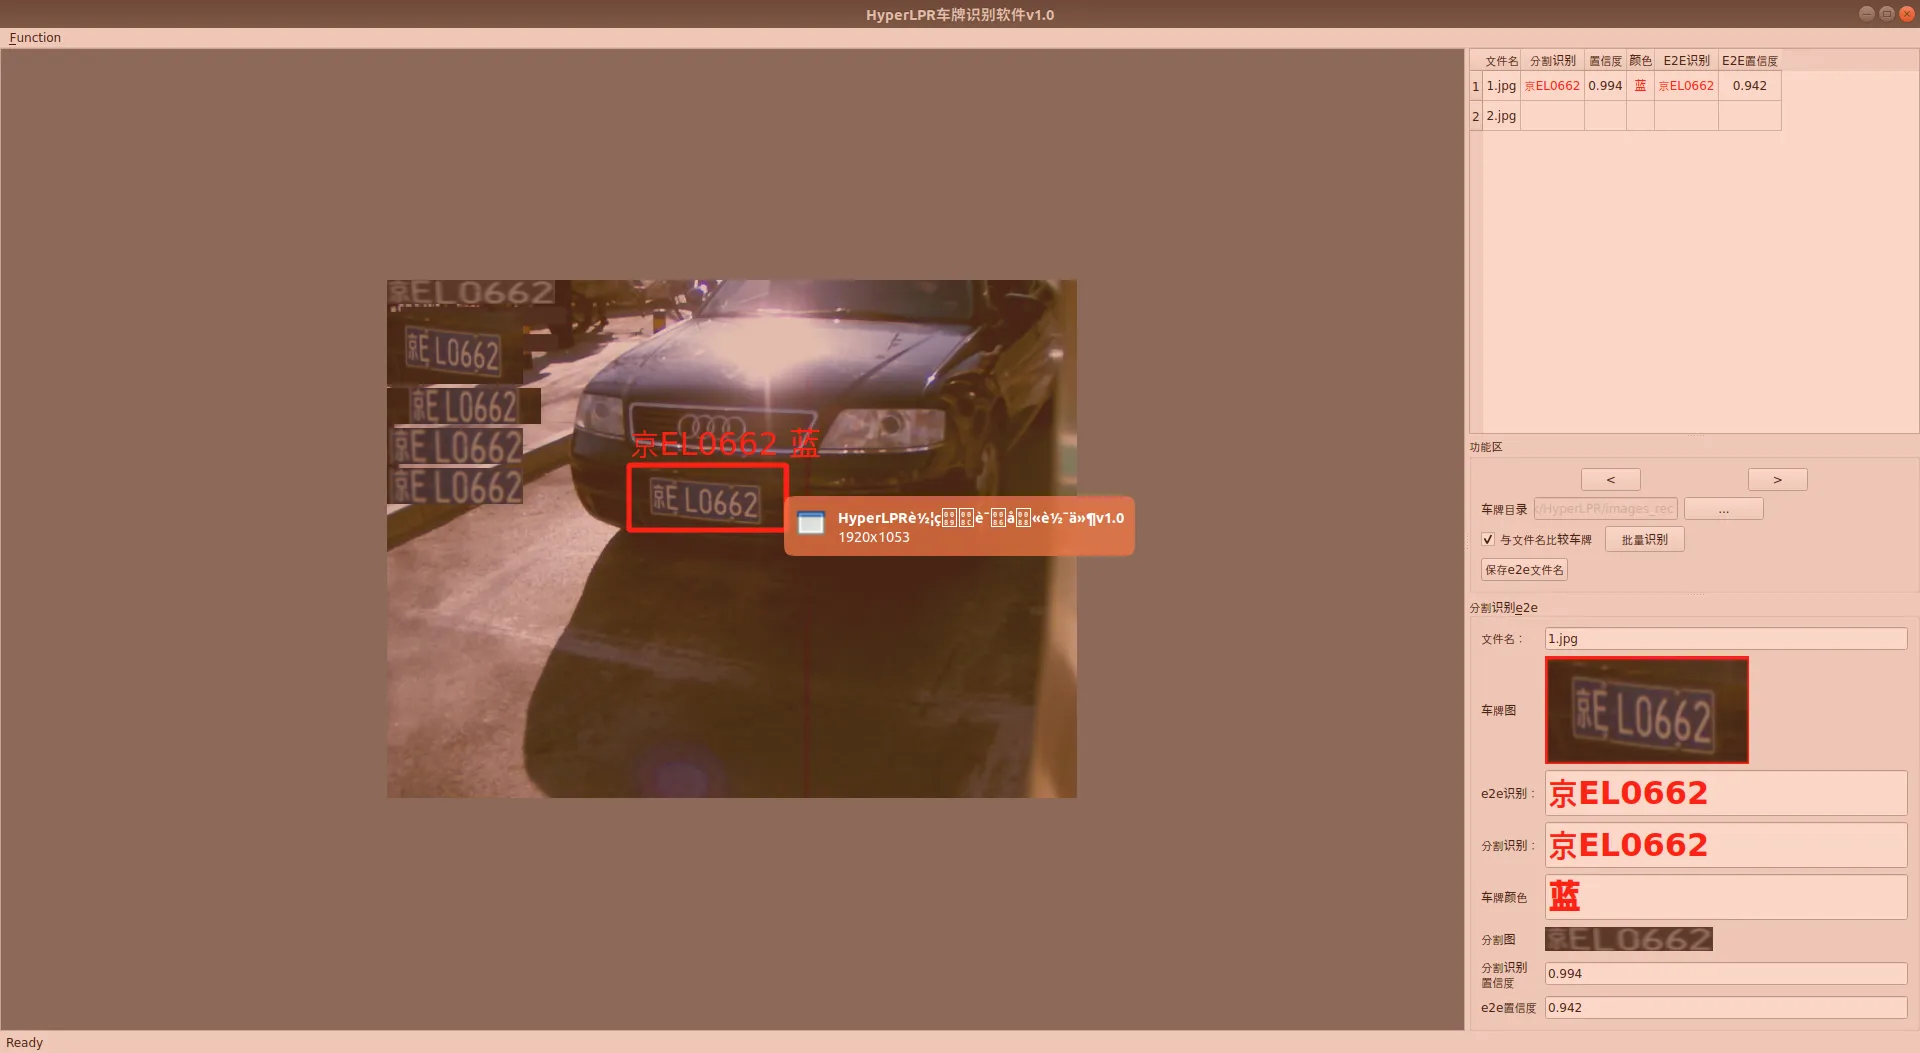
main()图形化的检测工具
热心的开发者在原有的框架基础之上,使用`Qt`给它套了个漂亮的外壳,方便那些不习惯使用命令行的童鞋,非常好
Q & A
Q1
module 'tensorflow.python.training.checkpointable' has no attribute 'CheckpointableBase'或者
longjing@FR:~/Work/gogs/LPR$ python test_video_file.py
Using TensorFlow backend.
Traceback (most recent call last):
  File "test_video_file.py", line 12, in
    from hyperlpr_py3 import pipline as pp
  File "/home/longjing/Work/gogs/LPR/hyperlpr_py3/pipline.py", line 5, in
    from . import segmentation
  File "/home/longjing/Work/gogs/LPR/hyperlpr_py3/segmentation.py", line 16, in
    from keras.models import Sequential
  File "/home/longjing/anaconda3/lib/python3.6/site-packages/keras/__init__.py", line 3, in
    from . import utils
  File "/home/longjing/anaconda3/lib/python3.6/site-packages/keras/utils/__init__.py", line 6, in
    from . import conv_utils
  File "/home/longjing/anaconda3/lib/python3.6/site-packages/keras/utils/conv_utils.py", line 9, in
    from .. import backend as K
  File "/home/longjing/anaconda3/lib/python3.6/site-packages/keras/backend/__init__.py", line 89, in
    from .tensorflow_backend import *
  File "/home/longjing/anaconda3/lib/python3.6/site-packages/keras/backend/tensorflow_backend.py", line 6, in
    from tensorflow.python.framework import ops as tf_ops
ModuleNotFoundError: No module named 'tensorflow.python.framework'
A1
重新安装`tensorflow-gpu`。如果没有`GPU`就安装`CPU`的版本
pip install --upgrade tensorflow-gpuQ2
安装了`tensorflow-gpu`,启动有提示缺少模块
longjing@FR:~/Work/github/HyperLPR$ python demo_py3.py
Using TensorFlow backend.
Traceback (most recent call last):
  File "demo_py3.py", line 41, in
    import HyperLPRLite as pr
  File "/home/longjing/Work/github/HyperLPR/HyperLPRLite.py", line 4, in
    from keras import backend as K
  File "/home/longjing/anaconda3/lib/python3.6/site-packages/keras/__init__.py", line 3, in
    from . import utils
  File "/home/longjing/anaconda3/lib/python3.6/site-packages/keras/utils/__init__.py", line 6, in
    from . import conv_utils
  File "/home/longjing/anaconda3/lib/python3.6/site-packages/keras/utils/conv_utils.py", line 9, in
    from .. import backend as K
  File "/home/longjing/anaconda3/lib/python3.6/site-packages/keras/backend/__init__.py", line 89, in
    from .tensorflow_backend import *
  File "/home/longjing/anaconda3/lib/python3.6/site-packages/keras/backend/tensorflow_backend.py", line 5, in
    import tensorflow as tf
  File "/home/longjing/anaconda3/lib/python3.6/site-packages/tensorflow/__init__.py", line 24, in
    from tensorflow.python import pywrap_tensorflow  # pylint: disable=unused-import
  File "/home/longjing/anaconda3/lib/python3.6/site-packages/tensorflow/python/__init__.py", line 88, in
    from tensorflow.python import keras
  File "/home/longjing/anaconda3/lib/python3.6/site-packages/tensorflow/python/keras/__init__.py", line 24, in
    from tensorflow.python.keras import activations
  File "/home/longjing/anaconda3/lib/python3.6/site-packages/tensorflow/python/keras/activations/__init__.py", line 22, in
    from tensorflow.python.keras._impl.keras.activations import elu
  File "/home/longjing/anaconda3/lib/python3.6/site-packages/tensorflow/python/keras/_impl/keras/__init__.py", line 21, in
    from tensorflow.python.keras._impl.keras import activations
  File "/home/longjing/anaconda3/lib/python3.6/site-packages/tensorflow/python/keras/_impl/keras/activations.py", line 23, in
    from tensorflow.python.keras._impl.keras import backend as K
  File "/home/longjing/anaconda3/lib/python3.6/site-packages/tensorflow/python/keras/_impl/keras/backend.py", line 37, in
    from tensorflow.python.layers import base as tf_base_layers
  File "/home/longjing/anaconda3/lib/python3.6/site-packages/tensorflow/python/layers/base.py", line 25, in
    from tensorflow.python.keras.engine import base_layer
  File "/home/longjing/anaconda3/lib/python3.6/site-packages/tensorflow/python/keras/engine/__init__.py", line 23, in
    from tensorflow.python.keras.engine.base_layer import InputSpec
  File "/home/longjing/anaconda3/lib/python3.6/site-packages/tensorflow/python/keras/engine/base_layer.py", line 35, in
    from tensorflow.python.keras import backend
  File "/home/longjing/anaconda3/lib/python3.6/site-packages/tensorflow/python/keras/backend/__init__.py", line 22, in
    from tensorflow.python.keras._impl.keras.backend import abs
ImportError: cannot import name 'abs'
A2
卸载`tensorflow-gpu`和`protobuf`,然后重新安装`tensorflow-gpu`,在安装`tensorflow-gpu`的过程中`pip`会自动帮你安装`protobuf`
pip uninstall tensorflow-gpu
pip uninstall protobuf
pip install --upgrade tensorflow-gpu