软硬件环境
- windows 10 64bit
- cuda 10.1
- cudnn 7.6.35
- anaconda with python 3.7
- ubuntu 18.04 64bit
- NVidia GTX 1070Ti
- cmake 3.18.4
- protobuf 3.8.0
视频看这里
此处是 youtube 的播放链接,需要科学上网。喜欢我的视频,请记得订阅我的频道,打开旁边的小铃铛,点赞并分享,感谢您的支持。
简介
OpenPose 人体姿态识别项目是美国卡耐基梅隆大学(CMU)基于卷积神经网络和监督学习并以 caffe 为框架开发的开源库。可以实现人体动作、面部表情、手指运动等姿态估计。适用于单人和多人,具有极好的鲁棒性,是世界上首个基于深度学习的实时多人二维姿态估计应用。人体姿态估计技术在体育健身、动作采集、人机交互、舆情监测等领域具有广阔的应用前景。
算法体验
如果仅仅是想体验下这个项目,官方提供了 windows 版的可执行文件下载,有 gpu 和 cpu 2个版本,地址是: https://github.com/CMU-Perceptual-Computing-Lab/openpose/releases/,解压后进入文件夹,下载项目中需要用到的各种模型
cd openpose\models
.\getModels.bat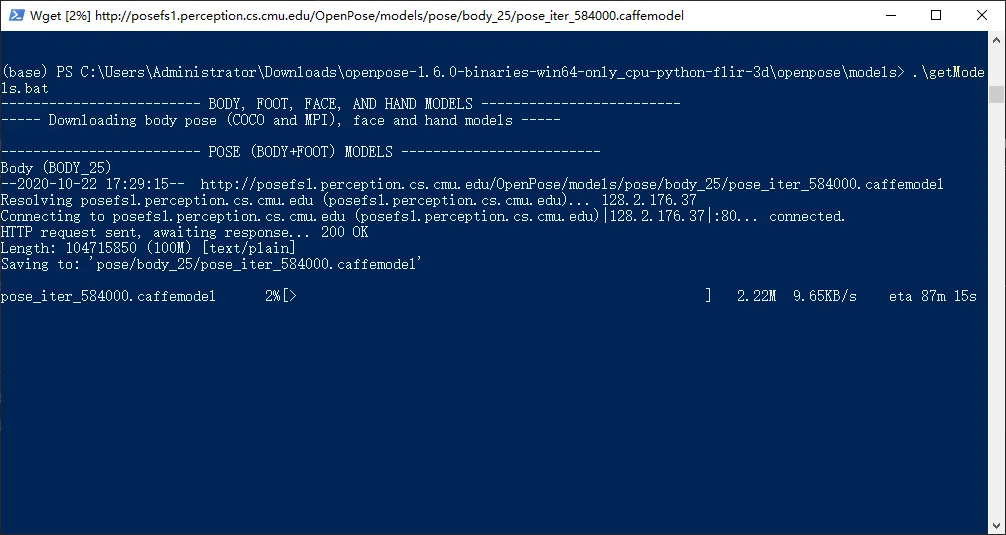
使用本地视频文件进行测试
cd ..
bin\OpenPoseDemo.exe --video examples\media\video.avi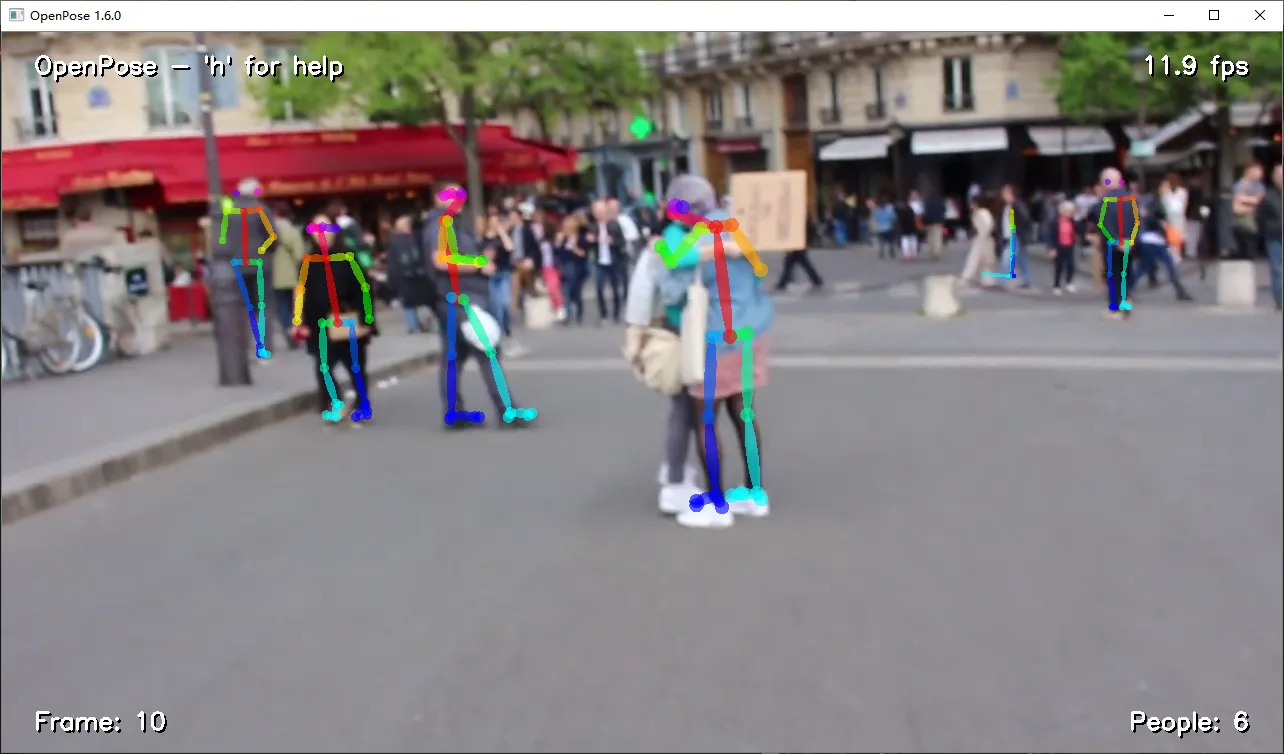
源码编译
我这里是有 gpu 环境,因此需要安装 nvidia 的驱动,cuda 和 cuDNN,具体安装方法前面的博文已经介绍过了,参考下面链接
git clone https://github.com/CMU-Perceptual-Computing-Lab/openpose.git
cd openpose
conda create -n openpose python=3.7
conda activate openpose
sudo apt install cmake build-essential
mkdir build
cd build
cmake ..
make -j `nproc`
cd ../models
./getModels.sh
cd ..
./build/example/openpose.bin --video examples/media/video.avi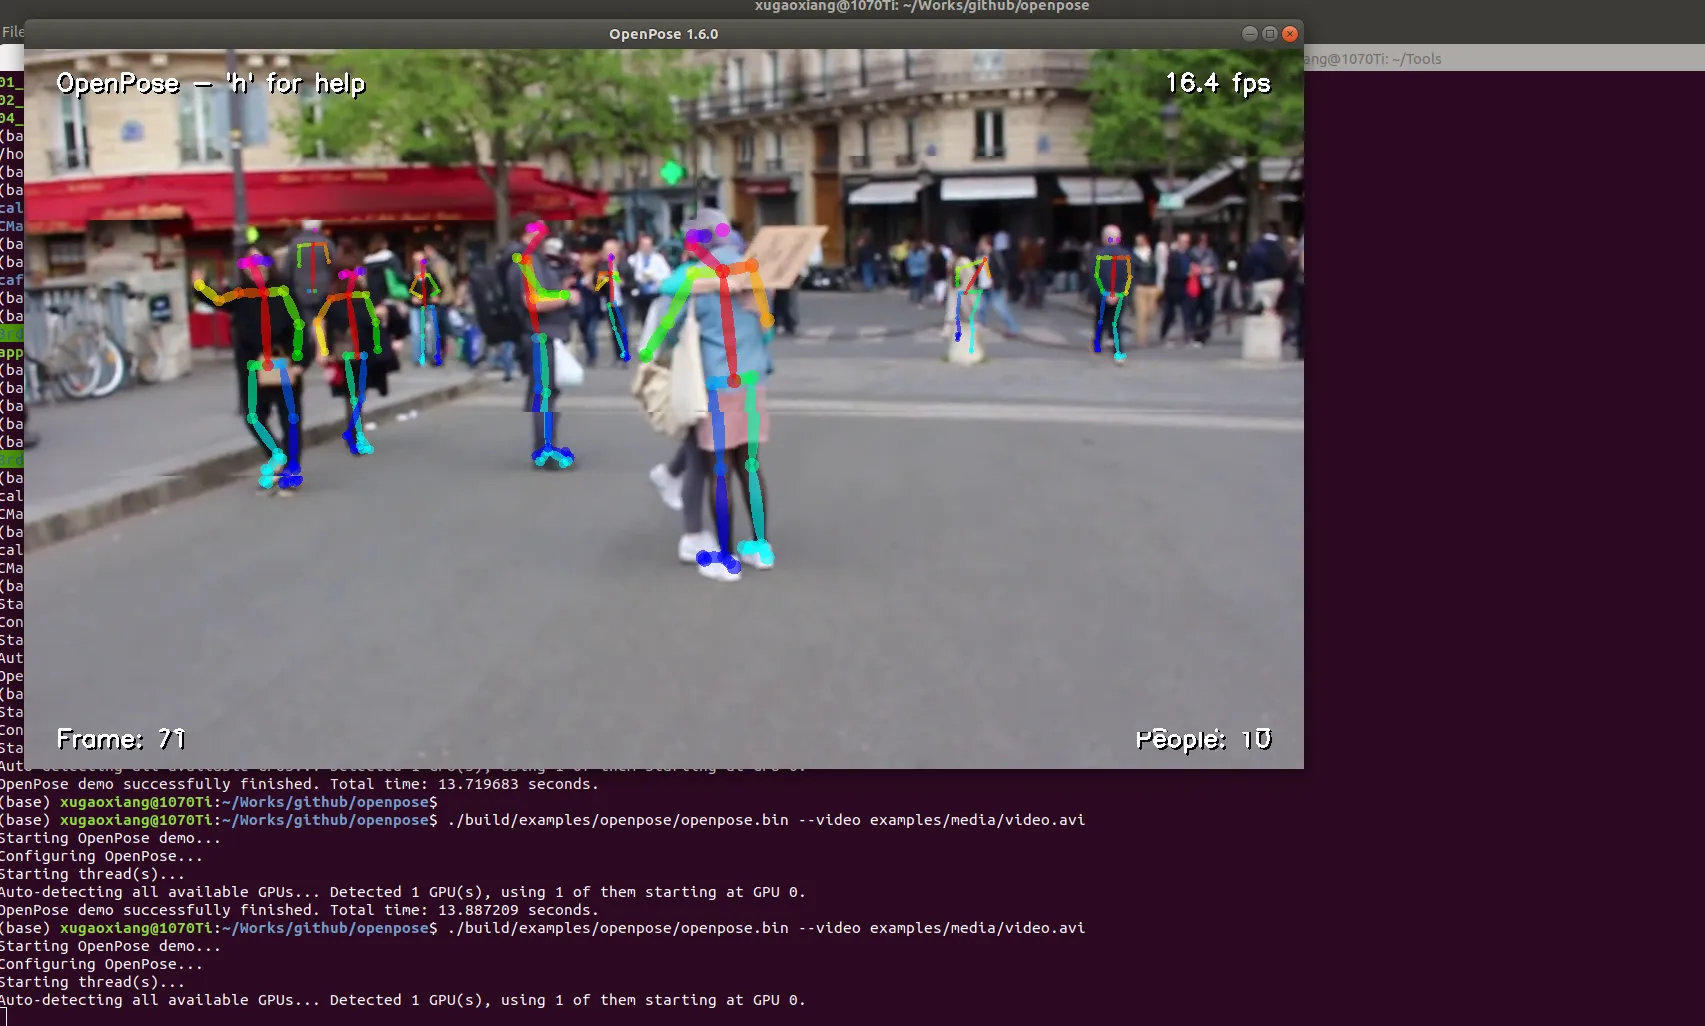
如果原来的系统中已经安装过了 caffe,那么 openpose 可以直接使用而不需要再次安装了
cmake -DBUILD_CAFFE=OFF -DCaffe_INCLUDE_DIRS=$somewhere/caffe/include/ -DCaffe_LIBS=$somewhere/lib/libcaffe.so ..如果需要在 python 中使用的话,cmake 时需要加上参数 -DBUILD_PYTHON=ON
如果不喜欢用命令行去配置 cmake,可以使用 cmake-gui,需要注意的是版本要求
sudo apt install cmake-qt-gui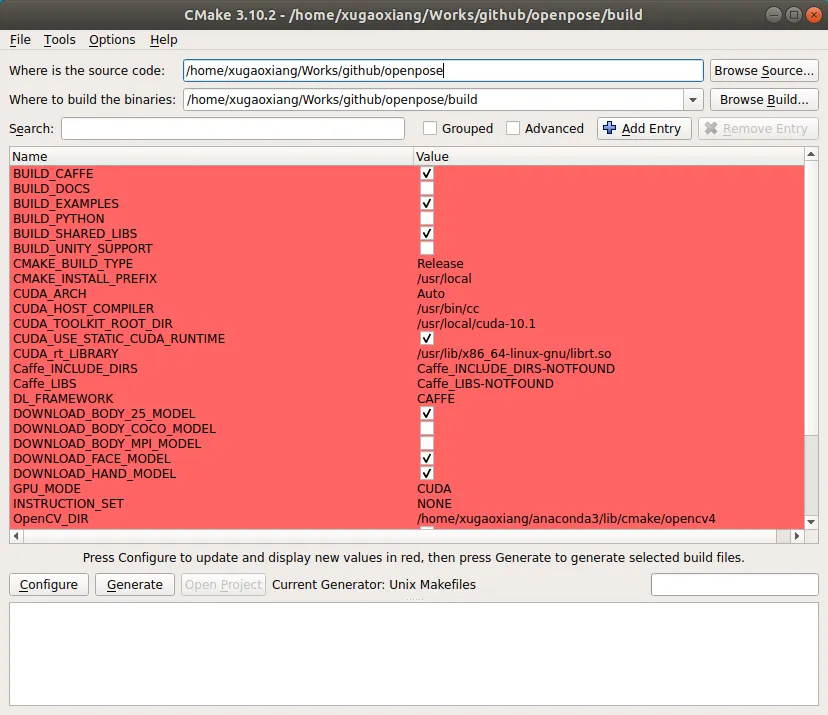
Python中如何使用?
如果想在 python 中去使用 openpose 进行姿态估计,需要将 openpose 编译成动态链接库,也就是 so
cmake -DBUILD_PYTHON=ON ..
make -j `nproc`
cd python
make
sudo make install
默认情况下 openpose 会被安装到目录 /usr/local/python 下,生成的动态库是 pyopenpose.cpython-37m-x86_64-linux-gnu.so,这里需要特别注意,so 文件名中包含了你系统中的 python (包括虚拟环境)版本号,这个 so 在其他 python 版中是无法使用的,会报错
Error: OpenPose library could not be found. Did you enable `BUILD_PYTHON` in CMake and have this Python script in the right folder?
cannot import name 'pyopenpose'
编译安装结束后,就可以进行测试了
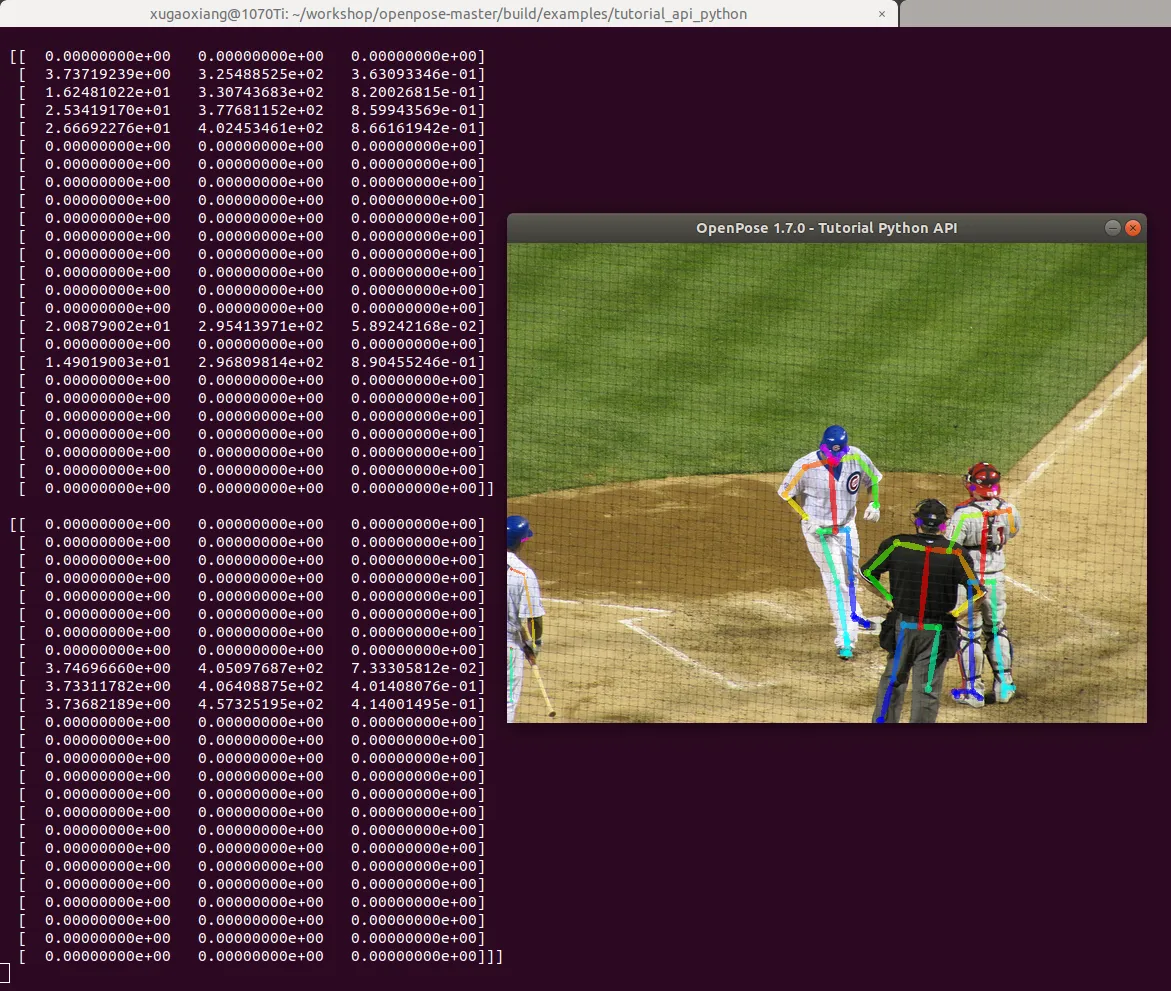
cd examples/tutorial_api_python
python 01_body_from_image.py
执行结果如下
模型下载
使用官方的模型下载脚本,速度非常的慢,这里将工程中用到的模型整理了,放在了百度网里,方便大家下载
链接:https://pan.baidu.com/s/15aZe7NN3jQerWN2uZRK0mw
提取码:p1mj
FAQ
各种奇奇怪怪的错误,这里罗列一下
pthread_create报错
Determining if the pthread_create exist failed with the following output:
Change Dir: /home/xugaoxiang/Works/github/openpose/build/CMakeFiles/CMakeTmp

Run Build Command:"/usr/bin/make" "cmTC_56b97/fast"
/usr/bin/make -f CMakeFiles/cmTC_56b97.dir/build.make CMakeFiles/cmTC_56b97.dir/build
make[1]: Entering directory '/home/xugaoxiang/Works/github/openpose/build/CMakeFiles/CMakeTmp'
/usr/bin/cmake: /home/xugaoxiang/anaconda3/lib/libcurl.so.4: no version information available (required by /usr/bin/cmake)
Building C object CMakeFiles/cmTC_56b97.dir/CheckSymbolExists.c.o
/usr/bin/cc   -fPIC    -o CMakeFiles/cmTC_56b97.dir/CheckSymbolExists.c.o   -c /home/xugaoxiang/Works/github/openpose/build/CMakeFiles/CMakeTmp/CheckSymbolExists.c
/usr/bin/cmake: /home/xugaoxiang/anaconda3/lib/libcurl.so.4: no version information available (required by /usr/bin/cmake)
Linking C executable cmTC_56b97
/usr/bin/cmake -E cmake_link_script CMakeFiles/cmTC_56b97.dir/link.txt --verbose=1
/usr/bin/cmake: /home/xugaoxiang/anaconda3/lib/libcurl.so.4: no version information available (required by /usr/bin/cmake)
/usr/bin/cc -fPIC     -rdynamic CMakeFiles/cmTC_56b97.dir/CheckSymbolExists.c.o  -o cmTC_56b97
CMakeFiles/cmTC_56b97.dir/CheckSymbolExists.c.o: In function `main':
CheckSymbolExists.c:(.text+0x1b): undefined reference to `pthread_create'
collect2: error: ld returned 1 exit status
CMakeFiles/cmTC_56b97.dir/build.make:97: recipe for target 'cmTC_56b97' failed
make[1]: *** [cmTC_56b97] Error 1
make[1]: Leaving directory '/home/xugaoxiang/Works/github/openpose/build/CMakeFiles/CMakeTmp'
Makefile:126: recipe for target 'cmTC_56b97/fast' failed
make: *** [cmTC_56b97/fast] Error 2
这是系统中缺失了 pthread 相关的库,解决方法
sudo apt-get install manpages-posix manpages-posix-devcaffe代码拉不下来
-- Found glog    (include: /usr/include, library: /usr/lib/x86_64-linux-gnu/libglog.so)
-- Found Protobuf: /usr/local/lib/libprotobuf.so;-lpthread (found version "3.8.0")
-- Found OpenCV: /usr (found version "3.2.0")
-- Caffe will be downloaded from source now. NOTE: This process might take several minutes depending
        on your internet connection.
-- Caffe has already been downloaded.
error: pathspec 'c95002f' did not match any file(s) known to git.
-- Caffe will be built from source now.
-- Download the models.
-- Downloading BODY_25 model...
-- Model already exists.
-- Not downloading body (COCO) model
-- Not downloading body (MPI) model
-- Downloading face model...
-- Model already exists.
-- Downloading hand model...
-- Model already exists.
-- Models Downloaded.
-- Configuring done
-- Generating done
-- Build files have been written to: /home/xugaoxiang/Works/github/openpose/build
CMU 自己维护了一个 caffe 的工程,但是找了一圈,并没有发现有 c95002f 这个 tag,所以,在配置的时候拉不下来源码,其实 clone 最新的就可以了,因此去修改 CMakeLists.txt,将 c95002f 替换成 master 就可以了

protobuf版本不一致
Protobuf compiler version doesn't match library version 3.8.0我这里使用的是 anaconda 的环境,默认安装的版本是3.11.4,与 caffe 要求的 3.8.0 不相符,使用 conda 安装 3.8.0 即可
conda install protobuf==3.8.0或者也可以编译 protobuf 源码,步骤如下
wget https://github.com/protocolbuffers/protobuf/archive/v3.8.0.tar.gz
tar xvf protobuf-3.8.0.tar.gz
cd protobuf-3.8.0
./autogen.sh
./configure
make
sudo make install
安装完毕之后,使用 protoc --version 来检查下版本是不是正确。anaconda 环境推荐使用 conda 安装,不是的话,源码安装。
atlas报错
CMake Error at /usr/share/cmake-3.10/Modules/FindPackageHandleStandardArgs.cmake:137 (message):
  Could NOT find Atlas (missing: Atlas_CLAPACK_INCLUDE_DIR
  Atlas_CBLAS_LIBRARY Atlas_BLAS_LIBRARY)
Call Stack (most recent call first):
  /usr/share/cmake-3.10/Modules/FindPackageHandleStandardArgs.cmake:378 (_FPHSA_FAILURE_MESSAGE)
  cmake/Modules/FindAtlas.cmake:43 (find_package_handle_standard_args)
  cmake/Dependencies.cmake:113 (find_package)
  CMakeLists.txt:46 (include)
因为系统中并没有安装 atlas,使用 apt 安装
sudo apt install libatlas-base-devcmake版本问题
-- NVIDIA CUDA:
--   Target GPU(s)     :   Auto
--   GPU arch(s)       :   sm_61
--   cuDNN             :   Yes (ver. 7.6.5)
--
-- Install:
--   Install path      :   /home/xugaoxiang/Works/github/openpose/build/caffe
--
CMake Error: The following variables are used in this project, but they are set to NOTFOUND.
Please set them or make sure they are set and tested correctly in the CMake files:
CUDA_cublas_device_LIBRARY (ADVANCED)
    linked by target "caffe" in directory /home/xugaoxiang/Works/github/openpose/3rdparty/caffe/src/caffe

-- Configuring incomplete, errors occurred!
See also "/home/xugaoxiang/Works/github/openpose/build/caffe/src/openpose_lib-build/CMakeFiles/CMakeOutput.log".
See also "/home/xugaoxiang/Works/github/openpose/build/caffe/src/openpose_lib-build/CMakeFiles/CMakeError.log".
CMakeFiles/openpose_lib.dir/build.make:105: recipe for target 'caffe/src/openpose_lib-stamp/openpose_lib-configure' failed
make[2]: *** [caffe/src/openpose_lib-stamp/openpose_lib-configure] Error 1
CMakeFiles/Makefile2:67: recipe for target 'CMakeFiles/openpose_lib.dir/all' failed
make[1]: *** [CMakeFiles/openpose_lib.dir/all] Error 2
Makefile:83: recipe for target 'all' failed
make: *** [all] Error 2
这个问题是由于系统中的 cmake 版本引起的,openpose 对 cmake 版本的最低要求是 3.12,具体可以参考链接 https://github.com/CMU-Perceptual-Computing-Lab/openpose/blob/master/doc/prerequisites.md#ubuntu-prerequisites, 而 ubuntu 18.04的默认版本是 3.10.2。解决方法有2种,分别是
-
使用
snap安装安装方法非常简单,但是国内的速度是真的真的真的慢,以至于后来,实在是等不下去了,我直接拉源码编译了。愿意等的话,也是可以成功的
sudo apt remove --purge cmake sudo snap install cmake --classic -
编译
cmake的源码源码编译
cmake,稍微复杂一点,步骤如下sudo apt remove --purge cmake sudo apt install libssl-dev qtbase5-dev wget https://github.com/Kitware/CMake/releases/download/v3.18.4/cmake-3.18.4.tar.gz tar xvf cmake-3.18.4 cd cmake-3.18.4 ./configure --qt-gui ./bootstrap make sudo make install这里将
cmake-gui也编译出来了,方便使用。
libpangoft报错
在 make 的过程中报错
[ 51%] Linking CXX shared library libopenpose_core.so
[ 51%] Built target openpose_core
[ 51%] Linking CXX executable 1_custom_post_processing.bin
//home/xugaoxiang/anaconda3/lib/libpangoft2-1.0.so.0: undefined reference to `FcWeightToOpenTypeDouble'
//home/xugaoxiang/anaconda3/lib/libpangoft2-1.0.so.0: undefined reference to `FcWeightFromOpenTypeDouble'
collect2: error: ld returned 1 exit status
examples/tutorial_add_module/CMakeFiles/1_custom_post_processing.bin.dir/build.make:171: recipe for target 'examples/tutorial_add_module/1_custom_post_processing.bin' failed
make[5]: *** [examples/tutorial_add_module/1_custom_post_processing.bin] Error 1
CMakeFiles/Makefile2:1280: recipe for target 'examples/tutorial_add_module/CMakeFiles/1_custom_post_processing.bin.dir/all' failed
make[4]: *** [examples/tutorial_add_module/CMakeFiles/1_custom_post_processing.bin.dir/all] Error 2
[ 51%] Linking CXX executable 18_synchronous_custom_all_and_datum.bin
//home/xugaoxiang/anaconda3/lib/libpangoft2-1.0.so.0: undefined reference to `FcWeightToOpenTypeDouble'
//home/xugaoxiang/anaconda3/lib/libpangoft2-1.0.so.0: undefined reference to `FcWeightFromOpenTypeDouble'
collect2: error: ld returned 1 exit status
examples/tutorial_api_cpp/CMakeFiles/18_synchronous_custom_all_and_datum.bin.dir/build.make:171: recipe for target 'examples/tutorial_api_cpp/18_synchronous_custom_all_and_datum.bin' failed
make[5]: *** [examples/tutorial_api_cpp/18_synchronous_custom_all_and_datum.bin] Error 1
CMakeFiles/Makefile2:1307: recipe for target 'examples/tutorial_api_cpp/CMakeFiles/18_synchronous_custom_all_and_datum.bin.dir/all' failed
make[4]: *** [examples/tutorial_api_cpp/CMakeFiles/18_synchronous_custom_all_and_datum.bin.dir/all] Error 2
Makefile:148: recipe for target 'all' failed
make[3]: *** [all] Error 2
CMakeFiles/openpose_lib.dir/build.make:143: recipe for target 'openpose_lib' failed
make[2]: *** [openpose_lib] Error 2
CMakeFiles/Makefile2:94: recipe for target 'CMakeFiles/openpose_lib.dir/all' failed
make[1]: *** [CMakeFiles/openpose_lib.dir/all] Error 2
Makefile:102: recipe for target 'all' failed
make: *** [all] Error 2
解决方法是,使用系统的 pangoft
cd $HOME/anaconda3/lib/
mv libpangoft2-1.0.so.0 libpangoft2-1.0.so.0.bak
ln -s /usr/lib/x86_64-linux-gnu/libpangoft2-1.0.so.0 libpangoft2-1.0.so.0
ubuntu16.04编译出错
在 ubuntu 16.04中,默认 gcc 和 g++ 是5.4版本,编译的时候就会碰到下面的报错
/home/xugaoxiang/anaconda3/envs/openpose/lib/libopencv_objdetect.so.3.3.1: undefined reference to std::thread::_State::~_State()@GLIBCXX_3.4.22

/home/xugaoxiang/anaconda3/envs/openpose/lib/libopencv_objdetect.so.3.3.1: undefined reference to std::thread::_M_start_thread(std::unique_ptr<std::thread::_State, std::default_delete<std::thread::_State> >, void (*)())@GLIBCXX_3.4.22

/home/xugaoxiang/anaconda3/envs/openpose/lib/libopencv_objdetect.so.3.3.1: undefined reference to typeinfo for std::thread::_State@GLIBCXX_3.4.22

collect2: error: ld returned 1 exit status
解决方法就是升级 gcc 和 g++,相应命令如下
sudo add-apt-repository ppa:ubuntu-toolchain-r/test
sudo apt-get update
sudo apt-get install gcc-7 g++-7

sudo update-alternatives --install /usr/bin/gcc gcc /usr/bin/gcc-7 100
sudo update-alternatives --config gcc

sudo update-alternatives --install /usr/bin/g++ g++ /usr/bin/g++-7 100
sudo update-alternatives --config g++
以后不管是升级、降级还是还原,都可以使用上述方法实现
anaconda和系统python的问题
几个类似的问题放在一起来说
(openpose) xugaoxiang@1070Ti:~/workshop/openpose-master/build/examples/tutorial_api_python$ python 01_body_from_image.py
[libprotobuf FATAL google/protobuf/stubs/common.cc:68] This program requires version 3.14.0 of the Protocol Buffer runtime library, but the installed version is 3.5.1.  Please update your library.  If you compiled the program yourself, make sure that your headers are from the same version of Protocol Buffers as your link-time library.  (Version verification failed in "google/protobuf/any.pb.cc".)
terminate called after throwing an instance of 'google::protobuf::FatalException'
  what():  This program requires version 3.14.0 of the Protocol Buffer runtime library, but the installed version is 3.5.1.  Please update your library.  If you compiled the program yourself, make sure that your headers are from the same version of Protocol Buffers as your link-time library.  (Version verification failed in "google/protobuf/any.pb.cc".)
Aborted (core dumped)
//usr/lib/x86_64-linux-gnu/libgdcmMSFF.so.2.8: undefined reference to `uuid_generate@UUID_1.0'
//usr/lib/x86_64-linux-gnu/libgdcmMSFF.so.2.8: undefined reference to `uuid_parse@UUID_1.0'
//usr/lib/x86_64-linux-gnu/libgdcmMSFF.so.2.8: undefined reference to `uuid_unparse@UUID_1.0'这种类型的错误会有很多,就不再贴错误信息了,主要是 anaconda 也是一个大型的工具包,同样的依赖库,可以通过 apt 安装在系统级目录里,也可以通过 conda 安装在 anaconda 的目录下,那么使用系统 python 的环境和 anaconda 中 python 环境编译就会有差异了,主要是查找路径的问题。特别需要注意的是在 anaconda 的环境中,如果缺库,就使用 conda 安装,如果库存在但还是报错找不到,可以明确指定路径查找,或者制作软连接。
cmake -DBUILD_PYTHON=ON -DPYTHON_EXECUTABLE=$PATH -DPYTHON_INCLUDE_DIR=$PATH ..