环境
- ubuntu 18.04 64bit
- RK1808开发板
- python 3.6.13
- rknn-toolkit 1.6.0
在PC上进行人体关键点检测
以下操作都是在 ubuntu 系统上操作
# 获取源码
git clone https://github.com/spmallick/learnopencv.git

# 进入目录
cd OpenPose-Multi-Person

# 添加可执行的权限
chmod a+x getModels.sh

# 执行脚本,下载caffe模型文件
./getModels.sh
模型默认是存放在 dropbox 上的,如果网络访问不了,请到下面的地址下载
链接:https://pan.baidu.com/s/1K99dn62LnMg7MD3hQWjD_w
提取码:hhah
下载后将文件,存放在目录 pose/coco 下
最后,执行测试代码
# 如果没有gpu的话,将gpu改成cpu,或者干脆不写device参数
python multi-person-openpose.py --device gpu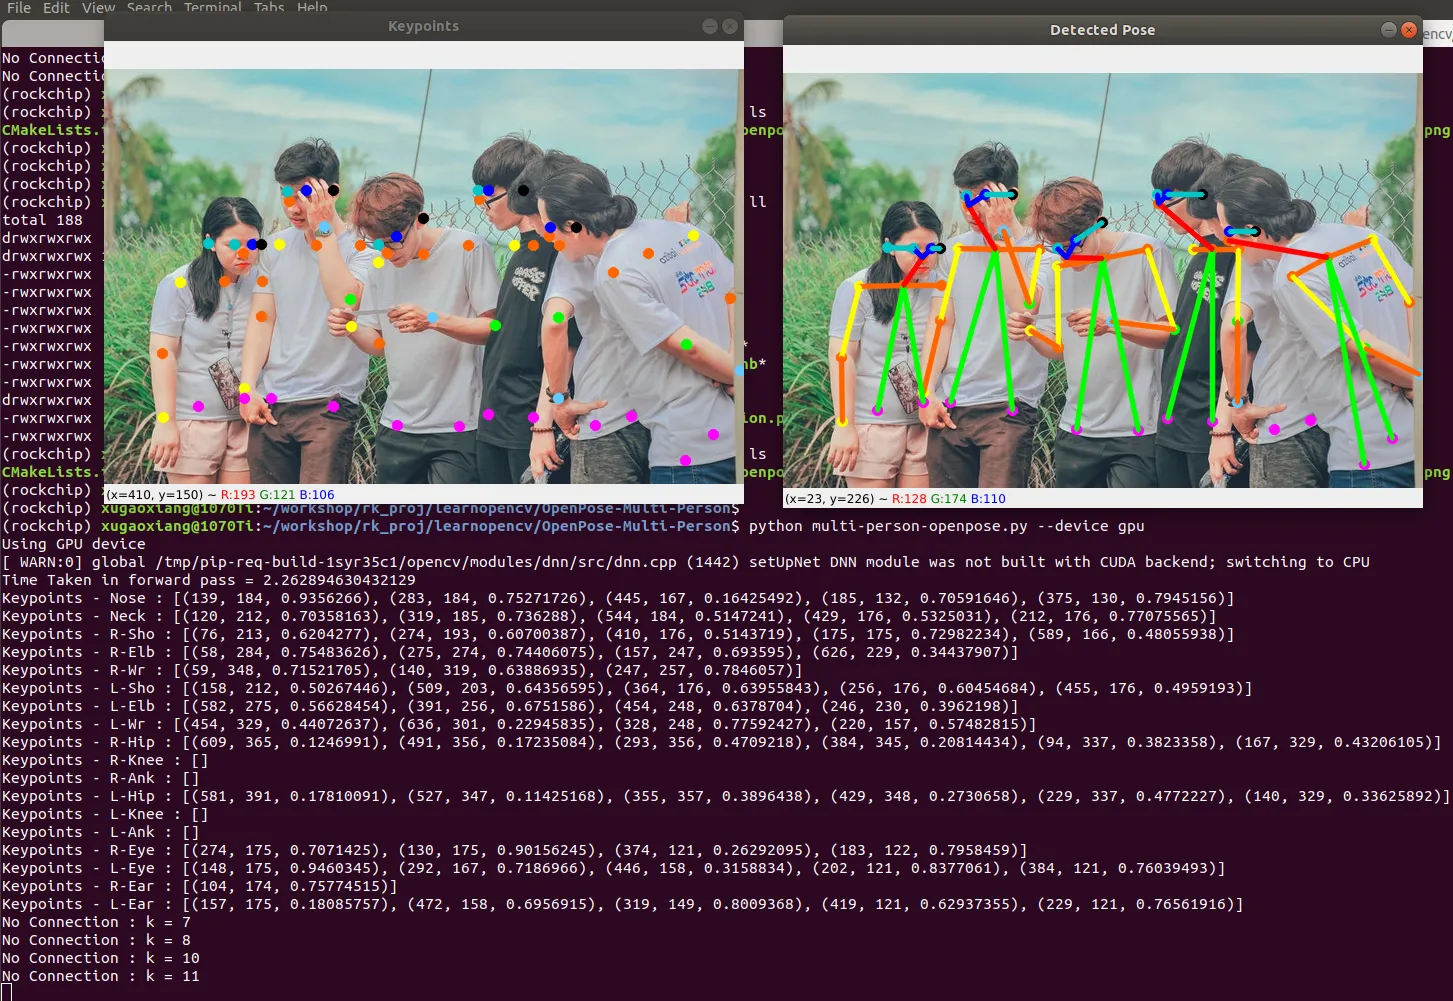
模型转换
接下来,我们将在 rk1808 开发板上去检测人体关键点。要实现这个目的,首先需要将 caffe 的模型转换成 rk1808 能够使用的模型
转换脚本
from rknn.api import RKNN
import cv2
import time
import numpy as np
if __name__ == '__main__':
# Create RKNN object
rknn = RKNN()
# pre-process config
print('--> config model')
# 配置模型输入,用于NPU对数据输入的预处理
# channel_mean_value='0 0 0 255',那么模型推理时,将会对RGB数据做如下转换
# (R - 0)/255, (G - 0)/255, (B - 0)/255。推理时,RKNN模型会自动做均值和归一化处理
# reorder_channel=’0 1 2’用于指定是否调整RBG顺序,设置成0 1 2即按输入的RGB顺序不做调整
# reorder_channel=’2 1 0’表示交换0和2通道,如果输入是RGB,将会被调整为BGR。如果是BGR将会被
# 调整为BGR
rknn.config(channel_mean_value='0 0 0 255', reorder_channel='2 1 0')
print('done')
# Load tensorflow model
print('--> Loading model')
# 如有不同路径,请自行修改
ret = rknn.load_caffe(model='./pose/coco/pose_deploy_linevec.prototxt', proto='caffe',
blobs='./pose/coco/pose_iter_440000.caffemodel')
if ret != 0:
print('Load model failed!')
exit(ret)
print('done')
# Build model
print('--> Building model')
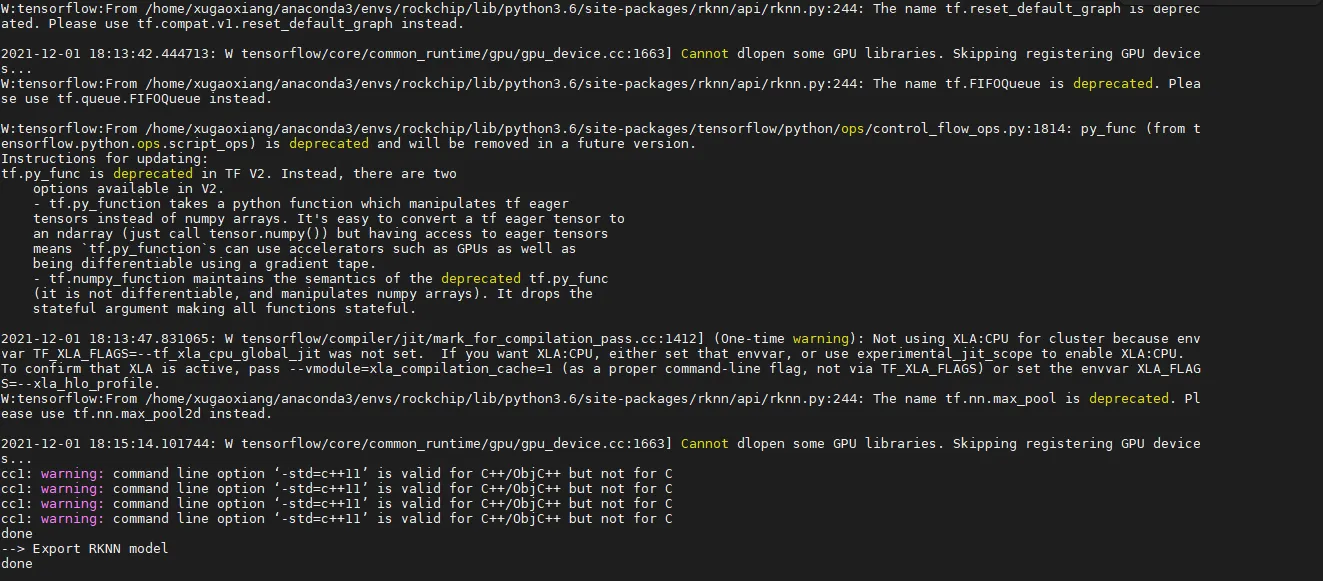
ret = rknn.build(do_quantization=True, dataset='./dataset.txt', pre_compile=True)
if ret != 0:
print('Build model failed!')
exit(ret)
print('done')
# Export rknn model
print('--> Export RKNN model')
ret = rknn.export_rknn('./pose_deploy_linevec_pre_compile.rknn')
if ret != 0:
print('Export model failed!')
exit(ret)
print('done')
rknn.release()执行上述代码,可以在当前目录下得到转换后的模型文件 pose_deploy_linevec_pre_compile.rknn
推理
接下来,编写测试脚本
from rknn.api import RKNN
import cv2
import time
import numpy as np

if __name__ == '__main__':
    nPoints = 18

    # 18个关键点信息以及对应的点对,就是互相连接的关键点
    POSE_PAIRS = [ [1,0],[1,2],[1,5],[2,3],[3,4],[5,6],[6,7],[1,8],[8,9],[9,10],[1,11],[11,12],[12,13],[0,14],[0,15],[14,16],[15,17]]
    # Create RKNN object
    rknn = RKNN()

    # 装载模型
    rknn.load_rknn('./pose_deploy_linevec_pre_compile.rknn')

    # init runtime environment
    print('--> Init runtime environment')

    # 初始化,指定开发板的型号、设备的id
    ret = rknn.init_runtime(target='rk1808', device_id='ab762efff1fc0a6d')
    if ret != 0:
        print('Init runtime environment failed')
        exit(ret)
    print('done')

    # 输入尺寸是368x368
    inWidth = 368
    inHeight = 368

    # 使用本地视频测试,也可以使用摄像头测试,填上对应的id
    cap = cv2.VideoCapture('video.avi')

    hasFrame, frame = cap.read()

    while cv2.waitKey(1) < 0:
        t = time.time()
        hasFrame, frame = cap.read()
        frame = cv2.resize(frame, (inWidth, inHeight), interpolation=cv2.INTER_CUBIC)
        if not hasFrame:
            cv2.waitKey()
            break

        frameCopy = np.copy(frame)
        frameWidth = frame.shape[1]
        frameHeight = frame.shape[0]
        threshold = 0.1
        t = time.time()

        np.set_printoptions(threshold=np.inf)

        # Inference
        #print('--> Running model')
        frameinput = np.transpose(frame, [2, 0, 1])
        t = time.time()
        [output] = rknn.inference(inputs=[frameinput], data_format="nchw")
        elapsed = time.time() - t
        print('inference image: %.4f seconds.' % (elapsed))
        np.set_printoptions(threshold=np.inf)

        #print('done')
        output = output.reshape(1, 57, 46, 46)
        H = output.shape[2]
        W = output.shape[3]

        # Empty list to store the detected keypoints
        points = []

        for i in range(nPoints):
            # confidence map of corresponding body's part.
            probMap = output[0, i, :, :]

            # Find global maxima of the probMap.
            minVal, prob, minLoc, point = cv2.minMaxLoc(probMap)

            # Scale the point to fit on the original image
            x = (frameWidth * point[0]) / W
            y = (frameHeight * point[1]) / H

            if prob > threshold :
                cv2.circle(frame, (int(x), int(y)), 8, (0, 255, 255), thickness=-1, lineType=cv2.FILLED)
                cv2.putText(frame, "{}".format(i), (int(x), int(y)), cv2.FONT_HERSHEY_SIMPLEX, 1, (0, 0, 255), 2, lineType=cv2.LINE_AA)

                # Add the point to the list if the probability is greater than the threshold
                points.append((int(x), int(y)))
            else :
                points.append(None)

        # Draw Skeleton
        for pair in POSE_PAIRS:
            partA = pair[0]
            partB = pair[1]

            if points[partA] and points[partB]:
                # 关键点用实心圆表示,点对用直线连接
                cv2.line(frameCopy, points[partA], points[partB], (0, 255, 255), 2)
                cv2.circle(frameCopy, points[partA], 8, (0, 0, 255), thickness=-1, lineType=cv2.FILLED)

        Keypoint = 'Output-Keypoints'
        cv2.namedWindow(Keypoint, cv2.WINDOW_NORMAL)
        cv2.imshow(Keypoint, frameCopy)

        #cv2.imwrite('Output-Keypoints.jpg', frameCopy)
        #cv2.imwrite('Output-Skeleton.jpg', frame)

        #print("Total time taken : {:.3f}".format(time.time() - t))

    rknn.release()
执行上述代码,可以看到
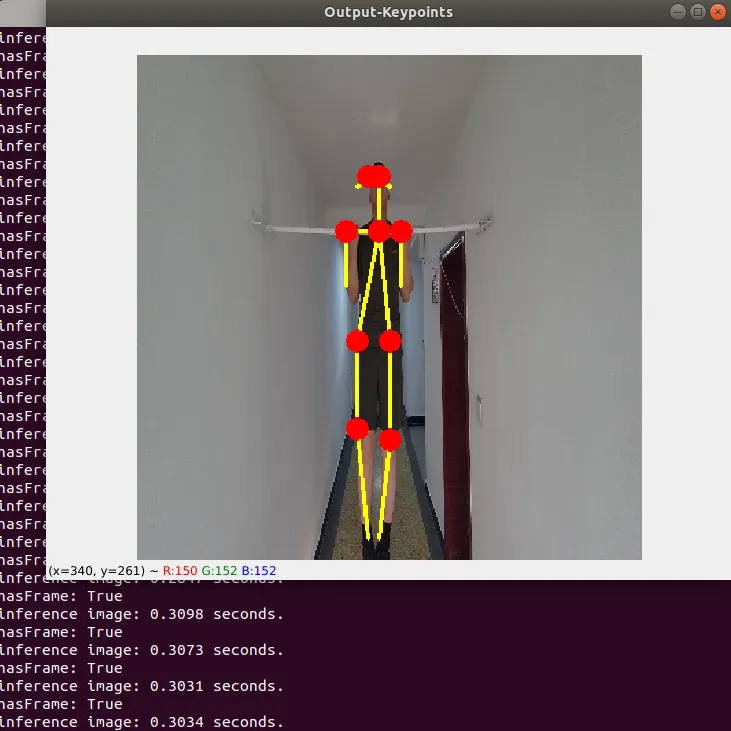
rk1808 上只有 3~4 的 fps。如果想达到更高,可以缩小网络 input 尺寸,大家自己可以去尝试尝试。