环境
- windows 10 64bit
- python 3.8
- httpx 0.23.0
简介
之前我们介绍过使用 requests 来进行 http 操作,本篇介绍另一个功能非常类似的第三方库 httpx,它提供了同步和异步的 API,同时支持 HTTP/1.1 和 HTTP/2,是一个全功能的 HTTP 客户端。
安装
使用 pip 安装,执行命令
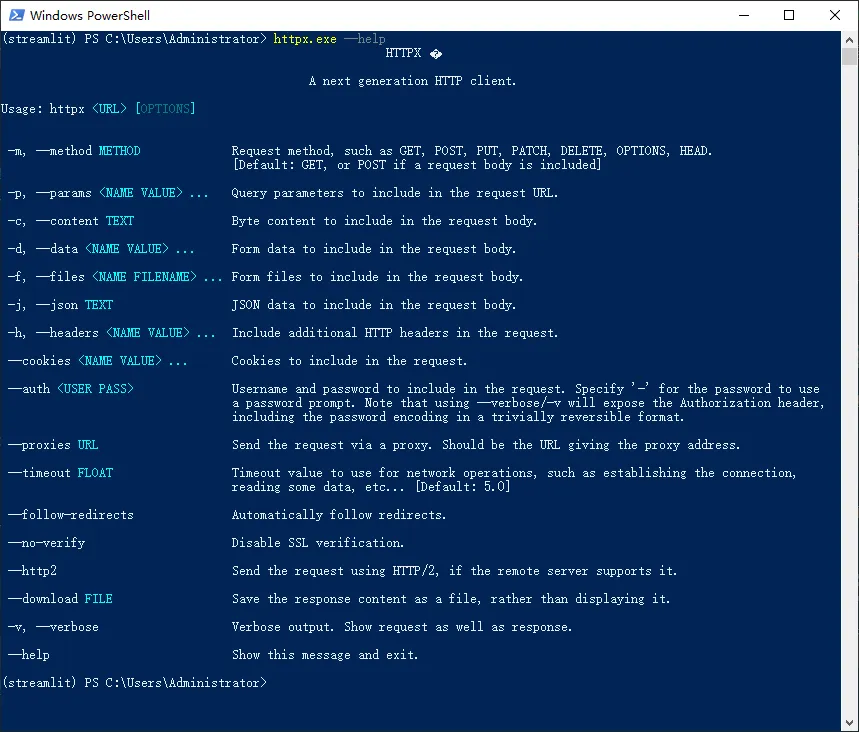
pip install httpx在安装 python 库的同时,还安装了命令行工具 httpx.exe

来看几个简单的示例
# get方法请求url
httpx.exe https://github.com -m get

# post方法请求url,同时上传一个文本文件
httpx.exe https://domain.com -m post -f test.txt
基本使用
还是拿之前的 flask 后端例子来讲
from flask import Flask, jsonify, request
from flask_restful import Api, Resource, reqparse

USERS = [
    {"name": "zhangsan"},
    {"name": "lisi"},
    {"name": "wangwu"},
    {"name": "zhaoliu"}
]

class Users(Resource):

    def get(self):
        return jsonify(USERS)

    def post(self):
        args = reqparse.RequestParser() \
            .add_argument('name', type=str, location='json', required=True, help="名字不能为空") \
            .parse_args()

        if args['name'] not in USERS:
            USERS.append({"name": args['name']})

        return jsonify(USERS)

    def delete(self):
        USERS = []
        return jsonify(USERS)

class UserId(Resource):

    def __init__(self):
        self.parser = reqparse.RequestParser()
        self.parser.add_argument('name', type=str)
        self.parser.add_argument('age', type=int)

    def get(self, userid):
        datas = self.parser.parse_args()

        return jsonify(
            {"name": USERS[int(userid)].get('name'), "age": datas.get('age')}
        )

    def post(self, userid):
        file = request.files['file']
        file.save('flask_file.txt')

        return jsonify({
            'msg' : 'success'
        })

app = Flask(__name__)
api = Api(app, default_mediatype="application/json")

api.add_resource(Users, '/users')
api.add_resource(UserId, '/user/<userid>')

app.run(host='0.0.0.0', port=5000, use_reloader=True, debug=True)启动后端服务后,接着来看看客户端的请求。httpx 的基本用法和 requests 近乎相同,很多时候,只需要将原来的代码中的 requests 换成 httpx 就行。
import httpx

# 使用get方法
r = httpx.get('http://127.0.0.1:5000/users')

# http返回码
print(r.status_code)

# http头
print(r.headers['content-type'])
# 也可以使用 r.headers.get('content-type')

# 接口返回的json
print(r.json())
import httpx
import json

param = {'name': 'xugaoxiang'}
headers = {"Content-type": "application/json"}

# post请求
r = httpx.post('http://127.0.0.1:5000/users', data=json.dumps(param), headers=headers)

print(r.status_code)
print(r.json())
import httpx

# delete请求
r = httpx.delete('http://127.0.0.1:5000/users')
print(r.json())
print(r.status_code)
除此之外,像 put、head、options 方法的请求也是类似的,这里就不再举例了
r = httpx.put(url, data={'key': 'value'})
r = httpx.head(url)
r = httpx.options(url)
高级用法
上面示例中的用法是 httpx 提供的 top-level API,这在写一些测试脚本或者做系统原型时问题不大,但真正要在实际项目中去用的话,就会有性能上的问题。这是因为 httpx 在进行每一次的请求时都会去重新建立一个链接,也就是原有的链接没有被复用,这在高并发的情况就显得特别低效。
类似于 requests 模块中的 Session,httpx 提供了 Client,它会使用 http 连接池,大大减少链接重新建立的次数,减少 cpu 的使用率,降低了网络拥堵,提升系统效率。
Client 的使用比较简单,推荐的做法是将 Client 作为 context 管理器,看下面的示例
import httpx

with httpx.Client() as client:
    # 请求部分,将原来的 httpx 换成 client 就可以了,参数是一样的
    r = client.get('http://127.0.0.1:5000/users')
    print(r.json())
    print(r.status_code)
同步请求与异步请求
默认情况下,httpx 提供的是标准同步 API,如果想使用异步请求,可以这样
import httpx
import asyncio

async def make_async_request():
    async with httpx.AsyncClient()  as client:
        r = await client.get('http://127.0.0.1:5000/users')
        print(r.json())
        print(r.status_code)

asyncio.run(make_async_request())
http2支持
要使能 http2,我们需要额外安装库 httpx[http2]
# 这个包名取的太奇怪了
pip install httpx[http2]
然后在初始化 client 的时候加上 http2 的支持
with httpx.Client(http2=True)  as client:
    r = client.get('http://127.0.0.1:5000/users')
Python实用模块专题
更多有用的 python 模块,请移步


