环境
- windows 10 64-bit
- python 3.7
- TecoGAN
- tensorflow 1.15.0
- pytorch 1.7
简介
TecoGAN 是一个基于 GAN 的自监督学习的图像增强器,也就是能让原来模糊的图像变得清晰,Teco 是 TEmporal COherence 的缩写。原作者的介绍视频地址: https://www.youtube.com/watch?v=pZXFXtfd-Ak,论文地址: https://arxiv.org/pdf/1811.09393.pdf


从官方给出的效果图来看,非常的惊艳。
项目体验
下载源码
git clone https://github.com/thunil/TecoGAN.git
cd TecoGAN
安装依赖
# 要求1.8以上,太高也会报错
pip install tensorflow-gpu==1.15.0
pip install -r requirements.txt
下载模型及数据
python runGAN.py 0开始推理
python runGAN.py 1默认处理文件夹 LR/calendar,处理后的结果存放于文件夹 results/calendar 下
使用自己的素材
目前只支持图片,所以是视频的话,就需要将其转成图片序列,放在一个文件夹内如 test,然后将文件夹 test 放到目录 LR下,修改文件 runGAN.py
elif( runcase == 1 ): # inference a trained model

    dirstr = './results/' # the place to save the results

    # 由默认的calendar改为test
    # testpre = ['calendar'] # the test cases
    testpre = ['test'] # the test cases

    if (not os.path.exists(dirstr)): os.mkdir(dirstr)

    # run these test cases one by one:
    for nn in range(len(testpre)):
        cmd1 = ["python3", "main.py",
            "--cudaID", "0",            # set the cudaID here to use only one GPU
            "--output_dir",  dirstr,    # Set the place to put the results.
            "--summary_dir", os.path.join(dirstr, 'log/'), # Set the place to put the log.
            "--mode","inference",
            "--input_dir_LR", os.path.join("./LR/", testpre[nn]),   # the LR directory
            #"--input_dir_HR", os.path.join("./HR/", testpre[nn]),  # the HR directory
            # one of (input_dir_HR,input_dir_LR) should be given
            "--output_pre", testpre[nn], # the subfolder to save current scene, optional
            "--num_resblock", "16",  # our model has 16 residual blocks,
            # the pre-trained FRVSR and TecoGAN mini have 10 residual blocks
            "--checkpoint", './model/TecoGAN',  # the path of the trained model,
            "--output_ext", "png"               # png is more accurate, jpg is smaller
        ]
        mycall(cmd1).communicate()
从上面的代码片段,可以看出,其原理是通过系统调用的方式去处理每一张图片,具体的逻辑实现是在文件 main.py 中
然后执行
python runGAN.py处理后的图片存放在目录 results/test 下
遇到的坑
tensorflow
基本上都是版本差异而引起的问题
问题一
"ImportError: cannot import name 'export_saved_model' from 'tensorflow.python.keras.saving.saved_model'"这个一般是由于安装了多个版本引起,需要先卸载干净,然后安装对应版本
pip uninstall tensorflow-gpu
pip install tensorflow-gpu==1.15.0
问题二
ImportError: cannot import name ‘get_config’ from ‘tensorflow.python.eager.context’修改文件 lib/ops.py,将 import keras 改为 from tensorflow import keras
问题三
ModuleNotFoundError: No module named ‘tensorflow.contrib’tensorflow 从 1.15版本后将 tensorflow.contrib 移除,可安装 1.14版本
pip install tensorflow-gpu==1.15.0问题四
AttributeError: module 'tensorflow' has no attribute 'set_random_seed'修改文件 main.py,将 tf.set_random_seed(1234) 改为 tf.random.set_seed(1234)
skimage
ImportError: cannot import name 'compare_ssim' from 'skimage.measure'这是版本更新后的 api 变化引起的
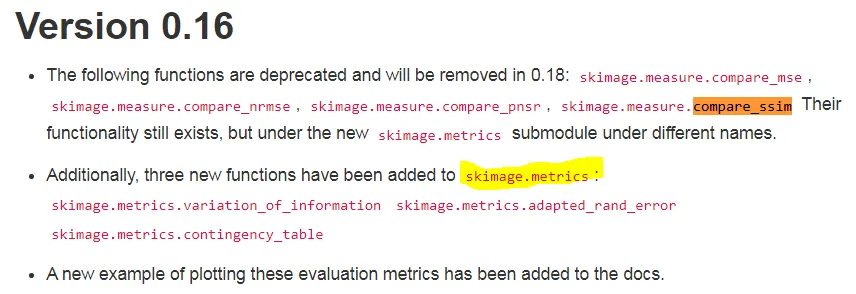
解决方法是安装较低版本,如0.16.2
pip install -U scikit-image==0.16.2numpy
NotImplementedError: Cannot convert a symbolic Tensor (2nd_target:0) to a numpy array这里要求 numpy 版本不要过高
pip install numpy==1.19.5wget
'wget' 不是内部或外部命令,也不是可运行的程序如果是 windows 系统,默认是没有 wget 工具的,工程中会使用它来下载数据包。下载地址 https://eternallybored.org/misc/wget/,然后将下载后的可执行 exe 文件拷贝到目录 C:\Windows\System32